

Hello everyone... ✨
Let's get started:😃

Hola a Todos... ✨
Comencemos:😃


• Cintas de quilling de diversos colores.
• Aguja para quilling.
• Plantilla para moldear círculos.
• Pega blanca extra fuerte (de carpintería).
• Pincel.
-
Quilling ribbons of different colors.
-
Quilling needle.
-
Template to mold circles.
-
Extra strong white glue (carpentry glue).
-
Paintbrush.


To make the flowerpot:
- We start by taking 5mm wide pearly quilling tape, with the quilling needle we are going to roll until we reach the end of the tape, we take it out of the needle and seal it with extra strong white glue. We will obtain a closed circle.
- We are going to mold in the template for circles in the number 15mm, we take out of the template and finish molding with our fingers, until we get the shape of a flower pot, we apply extra strong glue on the inside to prevent it from moving or deforming, let it dry very well.
To make the petals:
-
We take quilling tape 3mm wide yellow, blue and red, with a piece of each one we will make and with the help of the quilling needle we will roll up until we reach the end of the tape, we take out the needle we release a little until we get a small open circle, we seal with glue, we will need one of each color.
-
Once the circles are ready, mold them with your fingers forming peaks at the top.

Para la maceta:
• Comenzamos tomando cinta para quilling de color nacarado de 5mm de ancho, con la aguja para quilling vamos a enrollar hasta llegar al final de la cinta, sacamos de la aguja y sellamos con pega blanca extra fuerte. Vamos a obtener un círculo cerrado.
• Vamos a moldear en la plantilla para círculos en el numero 15mm, sacamos de la plantilla y terminamos de moldear con los dedos, hasta conseguir la forma de una maceta, aplicamos pega extra fuerte por la parte interna para evitar que se mueva o deforme, dejamos secar muy bien.
Para los pétalos:
• Tomamos cinta para quilling de 3mm de ancho color amarillo, azul y rojo, con un trozo de cada uno realizaremos y con la ayuda e la aguja para quilling enrollaremos hasta llegar al final de la cinta, sacamos de la aguja soltamos un poco hasta conseguir un pequeño circulo abierto, sellamos con pega, necesitaremos uno de cada color.
• Listos los círculos moldearemos con los dedos formando unos picos en la parte de arriba.


To make the stem:
- We take 3mm wide green quilling tape, we will make some folds applying glue to make it thicker, we will leave an opening at the tip, we will need 3 one for each petal.
- Once the stems are ready, we will apply extra strong white glue in the opening we left at the tip and we will place the petals.
To make the leaves:
- With 3mm wide green quilling tape we will make several open circles of different sizes, once ready we will flatten them with our fingers.
- Once all the pieces are ready, we will take the pot and apply extra strong white glue inside, we will place the leaves first, finally we will place the tulips, we can cut the stems to our liking so that the flowers are of different sizes.
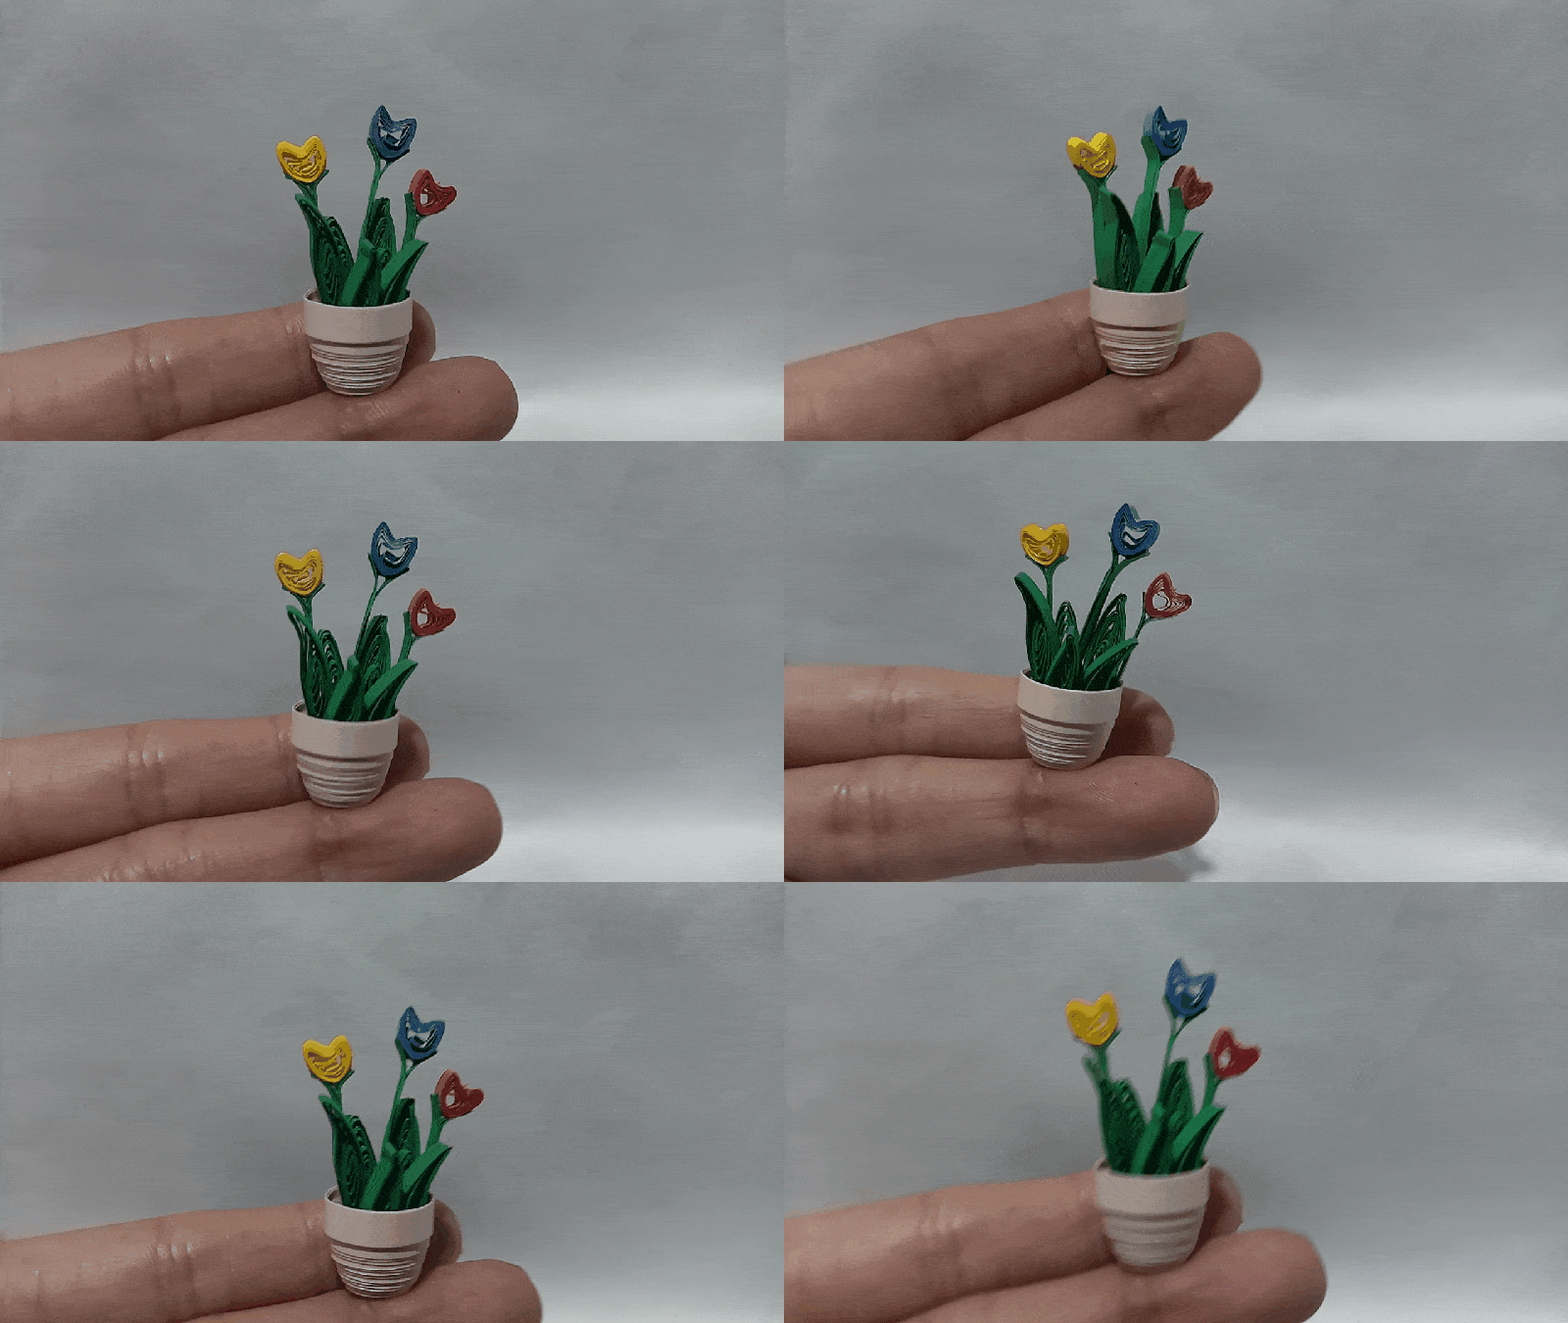
In this way we have this small pot of tricolor tulips in the quilling technique.
Para realizar el tallo.
• Tomamos cinta para quilling de color verde de 3mm de ancho, realizaremos unos dobleces aplicando pega para hacerlo mas grueso, dejaremos una abertura en la punta, necesitaremos 3 uno para cada pétalo.
• Una vez listos los tallos, aplicaremos pega blanca extra fuerte en la abertura que dejamos en la punta y colocaremos los pétalos.
Para realizar las hojas:
• Con cinta para quilling de 3mm de ancho color verde haremos varios círculos abiertos de diferentes tamaños, una vez listos aplanaremos con los dedos.
• Una vez listas todas las piezas, tomaremos la maceta y aplicaremos pega blanca extra fuerte en su interior, iremos colocando las hojas en primer lugar, por ultimo colocaremos los tulipanes, podemos cortar los tallos a nuestro gusto para que las flores queden de diversos tamaños.
De esta manera tenemos esta pequeña maceta de tulipanes tricolor en la técnica de quilling.


What did you think, did you like it?
I hope you did, I hope you liked my explanation, procedure and photos, I made them with love for you.
"Let out that muse that inspires you, and let your imagination fly".
Thank you all, see you next time...
All photos used in this post are of my authorship and have been taken on my personal cell phone a Redmi 9T and edited in Canva and in Inshot
Banner and separator made by me in Canva
Translated with the help of DeepL
Todas las fotos usadas en este post son de mi autoría y han sido sacadas en mi celular personal un Redmi 9T y editadas en Canva y en Inshot
Banner y separador hecho por mí en Canva
Traducido con la ayuda de DeepL

Posted Using InLeo Alpha
