

Hello everyone... ✨
In my last publications I have made some Kawai themed figures, a few days ago I made a necklace charm of a very small Kawai chick, in my post I put that if there was any user who had something in mind with that theme to put it in the comments, and I would study the possibility of making it in the technique I use, there were several who answered the call, among them the friend @verdeayer who suggested me to make a cupcake with the theme and in second option that if there was the possibility, taking into account that I work with paper ribbons, that if I could make a Totoro, and then I leaned towards this since my daughter is also a faithful fan of the character and when I mentioned it immediately shouted, THE TOTORO hahahaha.
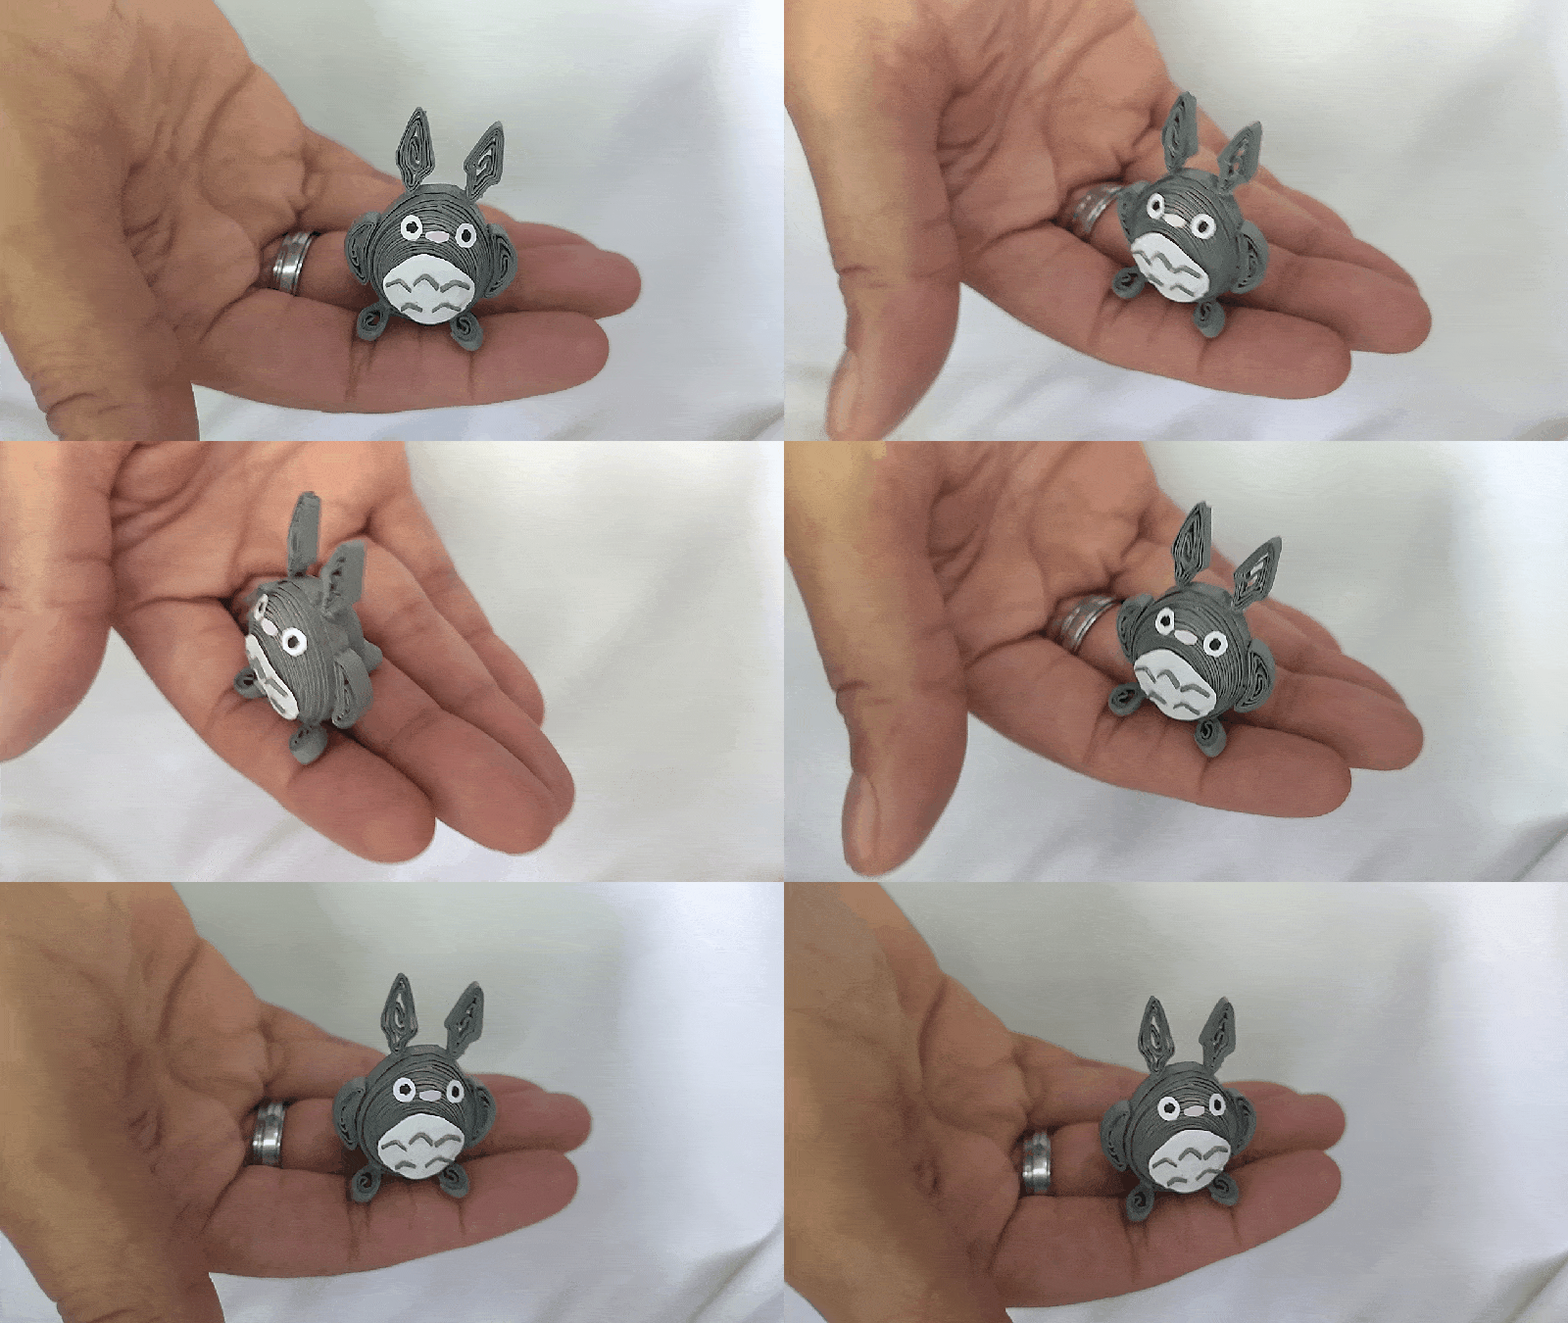
So here I present you a small Totoro in 3D decorative quilling technique.

Hola a Todos...✨

• Cintas de quilling de diferentes medidas.
• Aguja para quilling.
• Hoja blanca.
• Lápiz de color negro.
• Plantilla para moldear círculos.
• Pega blanca extra fuerte (de carpintería).
• Tijera.
• Pincel.
-
Quilling ribbons of different sizes.
-
Quilling needle.
-
White sheet.
-
Black pencil.
-
Template to mold circles.
-
Extra strong white glue (carpentry glue).
-
Scissors.
-
Brush.


-
Start by taking a 3mm wide gray quilling tape, with the quilling needle we will roll until we reach the end of the tape, take it out of the needle and seal it with extra strong white glue. We are going to obtain a closed circle, like this we will need 2 equal ones.
-
We will mold the closed circles in a template to mold circles, in the measure number 25mm, we will do this with both circles, we take out of the mold and apply extra strong white glue on the inside, to prevent the pieces from moving or deforming, we will let them dry very well.
-
Once the circles are dry, I proceeded to mold them with my fingers to give them a more elongated shape, then I joined them by applying a little glue and passing a gray ribbon around them with a little extra strong glue, this will be the body of the totoro.
-
To make the totoro's feet I made 2 open circles with 3mm wide gray ribbon, which I rolled with the quilling needle, then I molded them by pinching them with my fingers forming a kind of drop.
-
To make the tail, make a closed circle, which you can pull out a little with the help of a brush to give it an elongated shape, apply a little glue on the inside to prevent it from deforming, let it dry very well.
-
For the arms I made 2 open circles with 3mm wide gray tape, which I molded in the shape of a half moon.

• Comenzamos tomando cinta para quilling de color gris de 3mm de ancho, con la aguja para quilling vamos a enrollar hasta llegar al final de la cinta, sacamos de la aguja y sellamos con pega blanca extra fuerte. Vamos a obtener un círculo cerrado, como este necesitaremos 2 iguales.
• Moldearemos los círculos cerrados en una plantilla para moldear círculos, en la medida numero 25mm, esto lo haremos con ambos círculos, sacamos del molde y aplicaremos pega blanca extra fuerte en la parte interna, para evitar que se muevan o deformen las piezas, dejaremos secar muy bien.
• Secos los círculos procedi a moldearlos con los dedos para darle una forma mas alargada, luego los uní aplicando un poco de pega y pasando una cinta gris por alrededor con un poco de pega extra fuerte, este sera el cuerpo del totoro.
• Para realizar los pies del totoro realice 2 círculos abiertos con cinta de color gris de 3mm de ancho, la cual enrolle con la aguja para quilling, luego los moldee pellizcando con los dedos formando una especie de gota.
• Para la cola lleve a cabo un circulo cerrado, el cual saque un poco hacia afuera con la ayuda de un pincel para darle una forma alargada, aplique un poco de pega en su parte interna para evitar que se deformara, deje secar muy bien.
• Para los brazos realice 2 círculos abiertos con cinta color gris de 3mm de ancho, los cuales moldee en forma de media luna.


- Then I continued with the ears which I made with gray ribbons making 2 open circles which I molded as you can see in the image, in a very similar way to the ears of the character.
- For the eyes and belly I cut some circles from a white sheet, and for the nose I cut the figure from a pink quilling ribbon, the eye point I painted with a black pencil.
- To finish the details with quilling, I cut out strips of gray color of 1mm wide with which I formed small Vs.
- We finish joining all the pieces harmoniously with extra strong white glue, as you can see in the pictures.
In this way we have ready this little decorative Totoro in 3D, in the quilling technique.
• Luego seguí con las orejas las cuales elabore con cintas de color gris realizando 2 círculos abiertos los cuales moldee tal como pueden ver en la imagen, de manera muy similar a las orejas del personaje.
• Para los ojos y barriga recorte unos círculos de una hoja blanca, y para la nariz recorte la figura de una cinta de quilling color rosado, el punto del ojo lo pinte con un lápiz de color negro.
• Para culminar los detalle con quilling, recorte tiras de color gris de 1mm de ancho con las cuales forme pequeñas V.
• Finalizamos uniendo todas las piezas de manera armónica con pega blanca extra fuerte, como pueden ver en las imágenes.
De esta manera tenemos listo este pequeño Totoro decorativo en 3D, en la tecnica de quilling.


What did you think, did you like it?
I hope you did, I hope you liked my explanation, procedure and photos, I made them with love for you.
"Let out that muse that inspires you, and let your imagination fly".
Thank you all, see you next time.
All photos used in this post are of my authorship and have been taken on my personal cell phone a Redmi 9T and edited in Canva and in Inshot
Banner and separator made by me in Canva
Translated with the help of DeepL
Todas las fotos usadas en este post son de mi autoría y han sido sacadas en mi celular personal un Redmi 9T y editadas en Canva y en Inshot
Banner y separador hecho por mí en Canva
Traducido con la ayuda de DeepL

Posted Using InLeo Alpha
